Thursday, July 6, 2017

Pastry Board


A pastry board is a wonderful piece of baking equipment if you make a lot of pastries or breads.  It’s simple and inexpensive to make.  
 
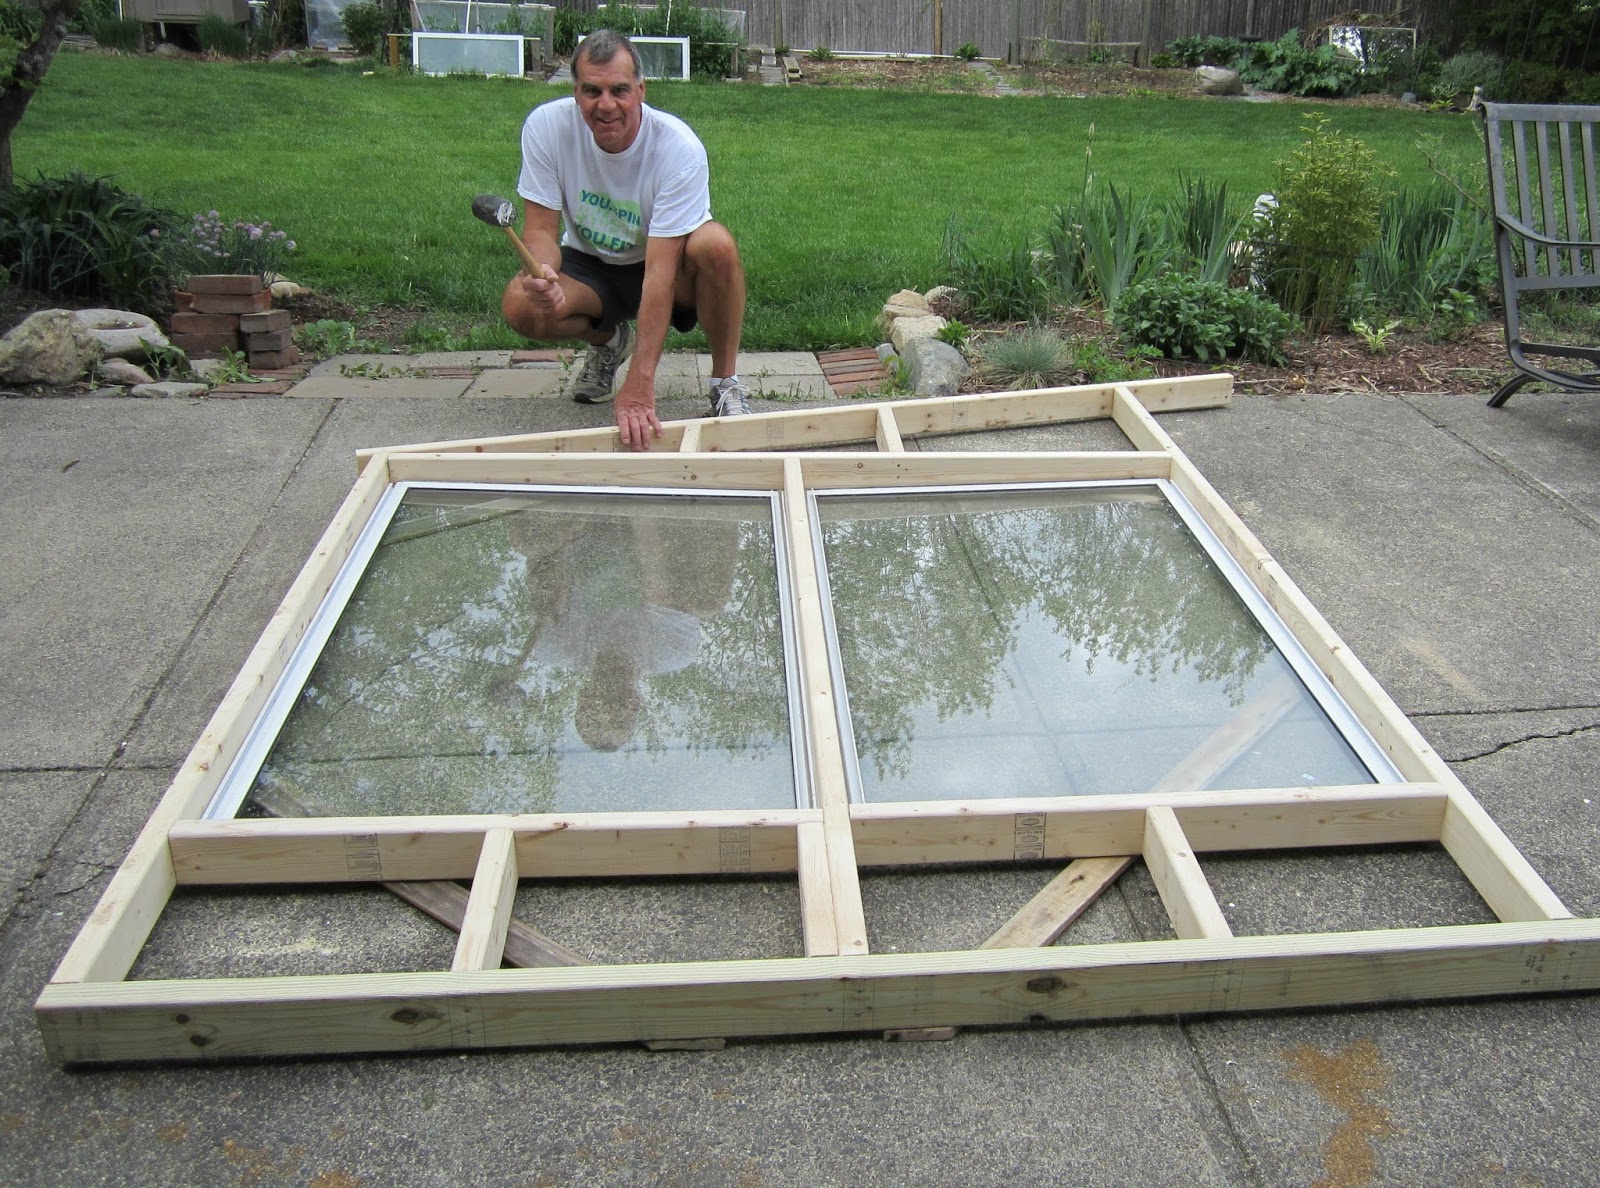
 I first used one while attending cooking classes in Siena.  To my delight, when we returned home, my husband took me to a home improvement store where we bought a scrap piece of high grade plywood and a piece of trim the length of the plywood.    Simply screw the trim piece to the bottom of the plywood.  This keeps the board from sliding off the counter when you are kneading or rolling the dough.   The edges were routered, but you don’t need to.  However, I do recommend sanding the edges.    Oil the board, wipe off the excess and you’re done. 
Just be sure you have space to store the board.  Also, don’t use it as a cutting board or it will be ruined.  When I need to cut the dough, I use a dull knife, dental floss, or my pastry scraper. So, If you’re like me and make a lot of breads and pastries, you may want to consider making a pastry board.   It’s one of my favorite toys.
Saturday, April 23, 2016

Vintage Hammered Aluminum


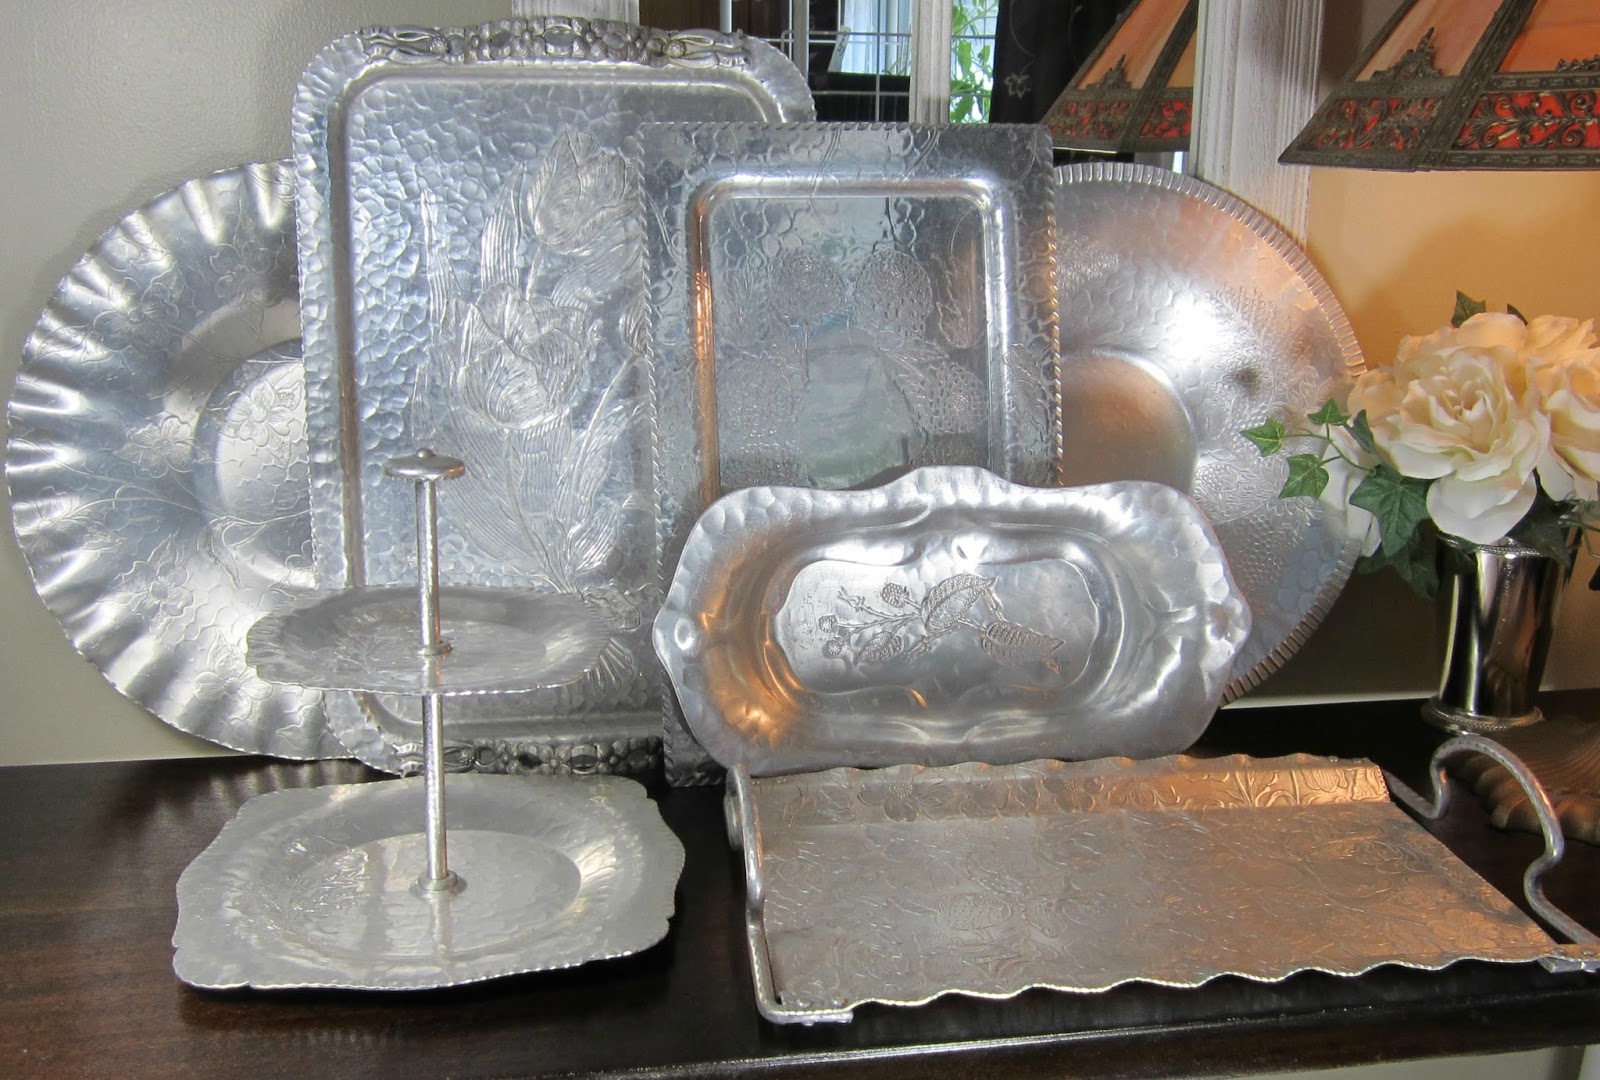
My little greenhouse/she shed has given me hours of enjoyment.  I love everything about it, including the decorating.  Finally, I had a space for my two milk cans, the perfect plant stands for some herbs, and I loved the way they complimented my galvanized watering cans and trays.  Consequently, when I saw a vintage aluminum dish at a thrift shop, I knew it would look perfect in the greenhouse.    And thus began my obsession.

A little nostalgia anyone?  These were often called poor-man’s silver and were the serving pieces my “child of the depression” mother had at home.  Hammered aluminum was very popular in the 1930’s, 1940’s and 1950’s, and were usually given as wedding gifts.  The pieces are cheaper and lighter than silver but never needed polishing.  The downside is they scratch and dent easily so they need to be treated with care.  They can be found in consignment or thrift shops for a few dollars, and there are a multitude of shapes, sizes and designs to suit anyone’s fancy.  The authentic collector would look for the company’s name and/or hallmark, and many times the product number and the term hand wrought or hand hammered  is indented into the piece.  I'd like to tell you that I'm a serious collector, but I'd be lying.  I just like what I like, and let's be real, it's going into the shed.

Vintage  aluminum pieces in the greenhouse


I have tried several methods of cleaning these pieces including baking soda and vinegar, cream of tartar and lemon juice, you name it.  Do NOT put them in the dishwasher, or use silver polish or silver pastes, for it will ruin the finish.   All that’s really needed is mild soap and water, but if that doesn’t do the trick, I found that Bar Keepers Friend worked fine for me.  In my search for methods to clean these vintage pieces, I’ve also come across a paste aluminum cleaner named “Mothers”, found in the auto supply stores.  The problem with this cleaner is that it leaves a film which can be unsafe if the piece is to be used with food.   Please note  when purchasing these aluminum pieces, any pitted or deteriorated finishes will  not give you the results you hope for, but they’re in the greenhouse so who cares. 


This large bowl is excellent for mixing potting soil,
the crumb catcher is ideal for scooping spilled soil,
small garden tools in the oval tray are readily accessible,
and the pea pod handled dish holds the season's plant tags.
 
Don't you love the pea pod handle?
Everlast Forged Aluminum Covered Bowl #1038


This flat tray was the perfect solution for this
little table with a broken glass top.
 
I was fixated on collecting the vintage aluminum trays for my seedlings, appreciating the attractive designs that rivaled any of the trays you buy at the garden centers.  They look so charming on the shelves.  Added bonus - they cost a fraction of store bought trays. 


Some of my treasures never made it to the shed.  This ice bucket is used to collect the kitchen scraps for the compost pile.


And this little tray is perfect for holding my kosher salt cellar, pepper mill, and the toothpicks for baking.


 During my treasure hunts, I found unique serving pieces that I thought would be perfect for my garden brunches.   I had originally bought this pie taker as a base for a miniature garden, which it still may become.  But as you can see, the casserole dish did make it into a miniature garden as has several other pieces. 


Vintage aluminum in the she shed
Yes, it's gotten out of control, but I love the hunt.  Searching for these distinctive pieces adds charm and character to my she shed, with a little bit of nostalgia.


Saturday, April 9, 2016

The Greenhouse/Potting Shed/She Shed


It has been two winter seasons since the greenhouse/potting shed has been completed and I thought I would share some of things I’ve learned. As always, I look forward to others ideas as well.
 
My husband had wanted to buy a greenhouse kit and assemble it for me years ago but I had always declined.  I didn’t want to waste space in my garden with a greenhouse, and I can't bear how oppressively hot greenhouses become in the summer.    But as I got more involved with winter gardening, I thought it was time to reconsider.  I wanted a greenhouse that was a combination potting shed and greenhouse.  I also wanted to remove the front windows during the summer and be able to plant directly in the greenhouse. You can see the beginning phase of the greenhouse on this blog “Recycling – Potting Station” page. 

I enjoy using recycled items and turning them into something sensational.  I had found an appealing greenhouse idea on Pinterest which I used as my inspiration.  My challenge was to try to build the greenhouse for under $250.  Yes, I was delusional.  I was able to get the windows at the ReStore for $5 a piece, and I did have some leftover wood from our renovation, but we had to buy considerably more than I expected.  I stopped using the costs spreadsheet when I hit $750.  At the end it probably costs just under $1000.  Just be prepared to spend more than you originally thought, but it’s worth every penny.


The first winter we had used the greenhouse, we had record snowfall here in the Northeast.  On two separate occasions, we had full week of no sun, which didn’t allow the greenhouse to warm up during the day.  I did make three terra-cotta space heaters which did increase the temperature in the greenhouse by a few degrees, but the candles last approximately four hours, so unless you get up in the middle of the night or get an electric heater, I wouldn’t expect the plants to survive.  Obviously, nothing is going to survive in those frigid temperatures. 
Terra-cotta Space Heater
 

 I also used floating row covers, a lightweight fabric which can be purchased in any garden center.  These covers allow 70% of light transfer, traps the sun’s heat, and increases the soil temperature a few degrees.  Even during one particular evening when the temperature dipped to 0°, the plants were fine.  I also recommend placing plastic milk containers filled with water near the plants to help retain heat during the evening.  The sun’s warmth heats the jugs during the day and releases that heat back into the greenhouse during the evening.  By experimenting, I found that milk jugs I had spray painted black were less likely to have any freezing and retained the most warmth.  Be sure to have an easily readable thermometer in your greenhouse.

Not only will you love your greenhouse, so will the little critters.  And not only will they love living in the greenhouse, they will love munching on the plants.  They ended up eating everything in the greenhouse.  I had better luck with the cloches which they did not touch.  But, you have to admit they are cute.  I plan to make some wire cover-cages and see how that works out next winter.
 
The bottom line is, and as much as I hate to admit it,  I should have listened to my husband and let him build me a greenhouse long ago.  It's my favorite play space.  I'm in it every day.


Monday, September 1, 2014

Small Batch Blueberry Jam

Small Batch Blueberry Jam


A recent visit to Haymarket resulted in purchasing a carton of blueberries at a steal.  I almost felt guilty.  I love interacting with the vendors, and my blueberry vendor had personality plus, a joy to talk to and do business with.  I knew the blueberries had been in the heat all day and would be a little worse for wear, but we love blueberries and they would be used in no time. 
 
I asked my husband if he had any preferences.  I made blueberry sauce for waffles, blueberry pancakes, blueberry salsa, blueberry muffins . . . you know, the usual.  What does he ask for?  Blueberry jam. 

 
I’ve never made blueberry jam before, and I don’t have canning equipment, so I thought I’d just do a small batch.  I looked at many recipes, but they either had too much sugar, too many ingredients or needed pectin.  I eliminated recipes with pectin because blueberries already have pectin in them, so why bother?  Also, most recipes had a ton of sugar.  I prefer a jam that tasted as naturally blueberry as possible.  So I decided to give it a whirl and make my own concoction.  It came out perfect so I thought I’d share.
 
 Small Batch Blueberry Jam
 
 4 Cups fresh blueberries
 
1 Cup sugar
 
1 Tablespoon fresh lemon juice
 
Generous pinch of cinnamon
 
 Mix all ingredients in a large pot and bring to a boil. Using a potato masher, give the mixture a good mashing. Cook over medium heat for approximately 30 minutes, stirring constantly, until thickened.
Before & After
 
That’s all there is to it.  Simple. 
  • Be sure to stir constantly so the jam doesn’t burn. 
  • It makes a smidgeon over a 1 cup of jam.  
  • The blueberry skins do break down, but if you would like a smoother jam, you can use your immersion blender. 
  • The jam should be good for a month, if it lasts that long.
Enjoy!


Tuesday, August 12, 2014

Miniature Gardens


The first time I saw a miniature garden was at the New England Flower Show and I was immediately hooked.  They were sweet and charming, and I had to add one to my garden. Of course, mine are very simple and unpretentious, but they still add delightful whimsy and charm, not to mention making a great conversation piece when friends visit my garden. 

What I learned:

Any container that strikes your fancy can be used, but it’s always beneficial if it has a drainage hole.  I admit most of mine do not.  If you have enough room to add gravel to the bottom of your container, that fabulous, but don't worry if you can not.  Just be careful watering.  Please note that the deeper the container, the less you'll need to water.  Likewise, the small saucer type gardens need to be watered more often, usually daily. 

Always use a quality potting soil.  It provides the ideal soil composition complete with nutrients that the plants need.

You can’t go wrong planting with sedums for shallow containers.  There are so many different varieties, they are easy to trim, and are very forgiving if you forget to water which I do often.

I love using herbs for deeper containers.  Most of my potted herbs and all my miniature gardens come into the house during the winter. My herbs look so much more attractive and interesting in a miniature garden setting than a simple pot.   

 
 Your garden doesn't need to be elaborate.  It's easy to find dollhouse size accessories to adorn your garden.   As odd as this sounds, I collect interesting rocks when I travel to add to my miniature gardens. It's a wonderful way to remember a  wonderful time.  For example, the rock in the bunny garden is from the driveway of a monastery in France, or the rock in the beach garden is from Kahana.   


You may have noticed a theme in all my gardens.  I always add a pet.  Not only because I love them, but I believe it gives the garden character.  As an added bonus, they provide continuity to all my miniature gardens.  I hope I've inspired you to try making one of these charming little treasures. Be creative and have fun!


 I use some of my vintage hammered aluminum pieces to make an interesting miniature garden collection.


Friday, June 27, 2014

Recycling - Potting Station


I took advantage of my daughter’s kitchen renovation and grabbed two of her cabinets about to be trashed, to use as the base of a potting station.  I took the top cabinets because they are narrower, taking up much less valuable space in the greenhouse.  


Her cabinets were the 80’s Formica type cabinets typical in so many condos, so I simply took some plywood we had on hand and cut doors to size.  I “splurged” in spending $3 for the doors’ trim.  The cabinets sit on the panel that enclosed the refrigerator.  The sleek size of the potting table fits perfectly into the space, and as I have another larger potting table next to the house, this is ideal. My frugality continued by recycling some old wood planks I found in the garden to be used as the table top, achieving the rustic look I was hoping for.  I loved the stool I found for only $5 from a local thrift store.  The bead board was from the Restore at $6 a piece, and the shelves were made from old outdoor steps laid on flower box brackets I had stashed in the shed.    

So, if you are looking for a very easy, efficient, and no or low cost potting table - be on the hunt for some old kitchen cabinets from friends, or lying by the side of the road during trash day.  I am ecstatic with the end result, and love the look nestled with my vintage milk cans, galvanized watering cans, and aluminum serving pieces so prevalent in the 1950's.  I love this space!


Thursday, April 10, 2014

Bunny Bread


This is my simple and easy attempt to recreate a bunny shaped bread that I saw at the Burlington Bread Company in Vermont.   It's a cute and edible decoration for the spring table.

I used half the Honey Oat Pan Rolls recipe on Allrecipes for this particular bunny bread, but you can use your favorite bread recipe.


After the bread’s first rise, gently punch down and let it rest for 10 minutes.

 
After the dough has rested, divide the dough into thirds.

1. Divide the first third into five balls for the paws and bunny tail.

2. Roll the second third into one ball to make the body.

3. Divide the last third in half.  Roll the first half  into one long cylinder that is tapered at the ends.  Cut the cylinder in half to make the ears. Make a lengthwise indentation in the ears. Roll the other half into a ball for the head.


Assemble the pieces together as shown. Make a small indentation for the eyes and insert raisins.
Let the dough rise to twice the size and brush with an egg wash. 

That's all there is to it. 


Friday, December 13, 2013

Italian Herb & Cheese Bread


Because I love to bake, my family expects fresh breads for the holidays.  So when Allrecipes and Sargento Cheese challenged me to create a recipe using their cheese for a Thanksgiving dinner, my first thought was bread.  My goal was to create a recipe that was delicious, different and easy.  I love artisian breads as does my family.  I understand that some people may be intimated with yeast recipes, because I used to be, but this recipe is an easy way to bake a delicious rustic loaf of bread that is as good as any high-quality bread bakery.

Lately I’ve been experimenting with bread recipes using a poolish or biga, a type of pre-fermentation process that adds complexity to the flavor and texture of the bread.  The fermentation process develops gluten, therefore eliminating the need for kneading; and because it is best made about 18 hours before shaping (or the day before), is perfect for holiday dinners or dinner parties where you have so much to do on that day but still want to bake and serve a freshly baked loaf. 
 

A few notes:

I use active dry yeast, so I always proof the yeast in 110˚ water until foamy, before adding the remaining ingredients.

During the fermentation process you will want the gases to be able to escape as the dough rises, so poke a small hole in the plastic wrap that has been wrapped tightly over the bowl before putting it in the refrigerator.

Put a pan filed with about 2 inches of water in the oven during preheating and baking to produce steam to create a wonderful crust.

This bread is modestly flavored to appeal to a variety of palates and it’s very easy to make.  Serve at dinner and/or use for the perfect paninis made with leftover turkey.
 
Italian Herb & Cheese Bread
 
1 Cup & 2 TBL water (110°)
1 teaspoon sugar
½ teaspoon yeast
¼ teaspoon garlic powder
¾ teaspoon Italian seasoning
2 ½ cup All Purpose flour
½ teaspoon kosher salt
½ cup Sargento 6 Italian Cheese blend
 
In a large bowl, add the water, yeast and sugar and wait approximately 10 minutes until the mixture is foamy. Add the remaining ingredients and stir until well blended. Cover the bowl tightly with plastic wrap, poking a small hole in the top to allow any gases to escape. Place in the refrigerator overnight. You will have the best results if the dough is allowed to rise for about 18 hours. The next day, shape the dough into a baguette, and allow to rise until double. Preheat to 425° in which a pan of water has been placed on the bottom of the oven. With a sharp knife, make a ½ inch slash into the center of the bread and bake for 30 minutes or until nicely browned.


You can find this recipe on the Sargento website along with many wonderful recipes to try.  Enjoy!